Creating Your First Card
Virtual cards are the core of the Parent.credit experience. Create a card for each child to help them learn about credit, spending responsibility, and managing financial obligations through real-world experiences.
Card Creation Process
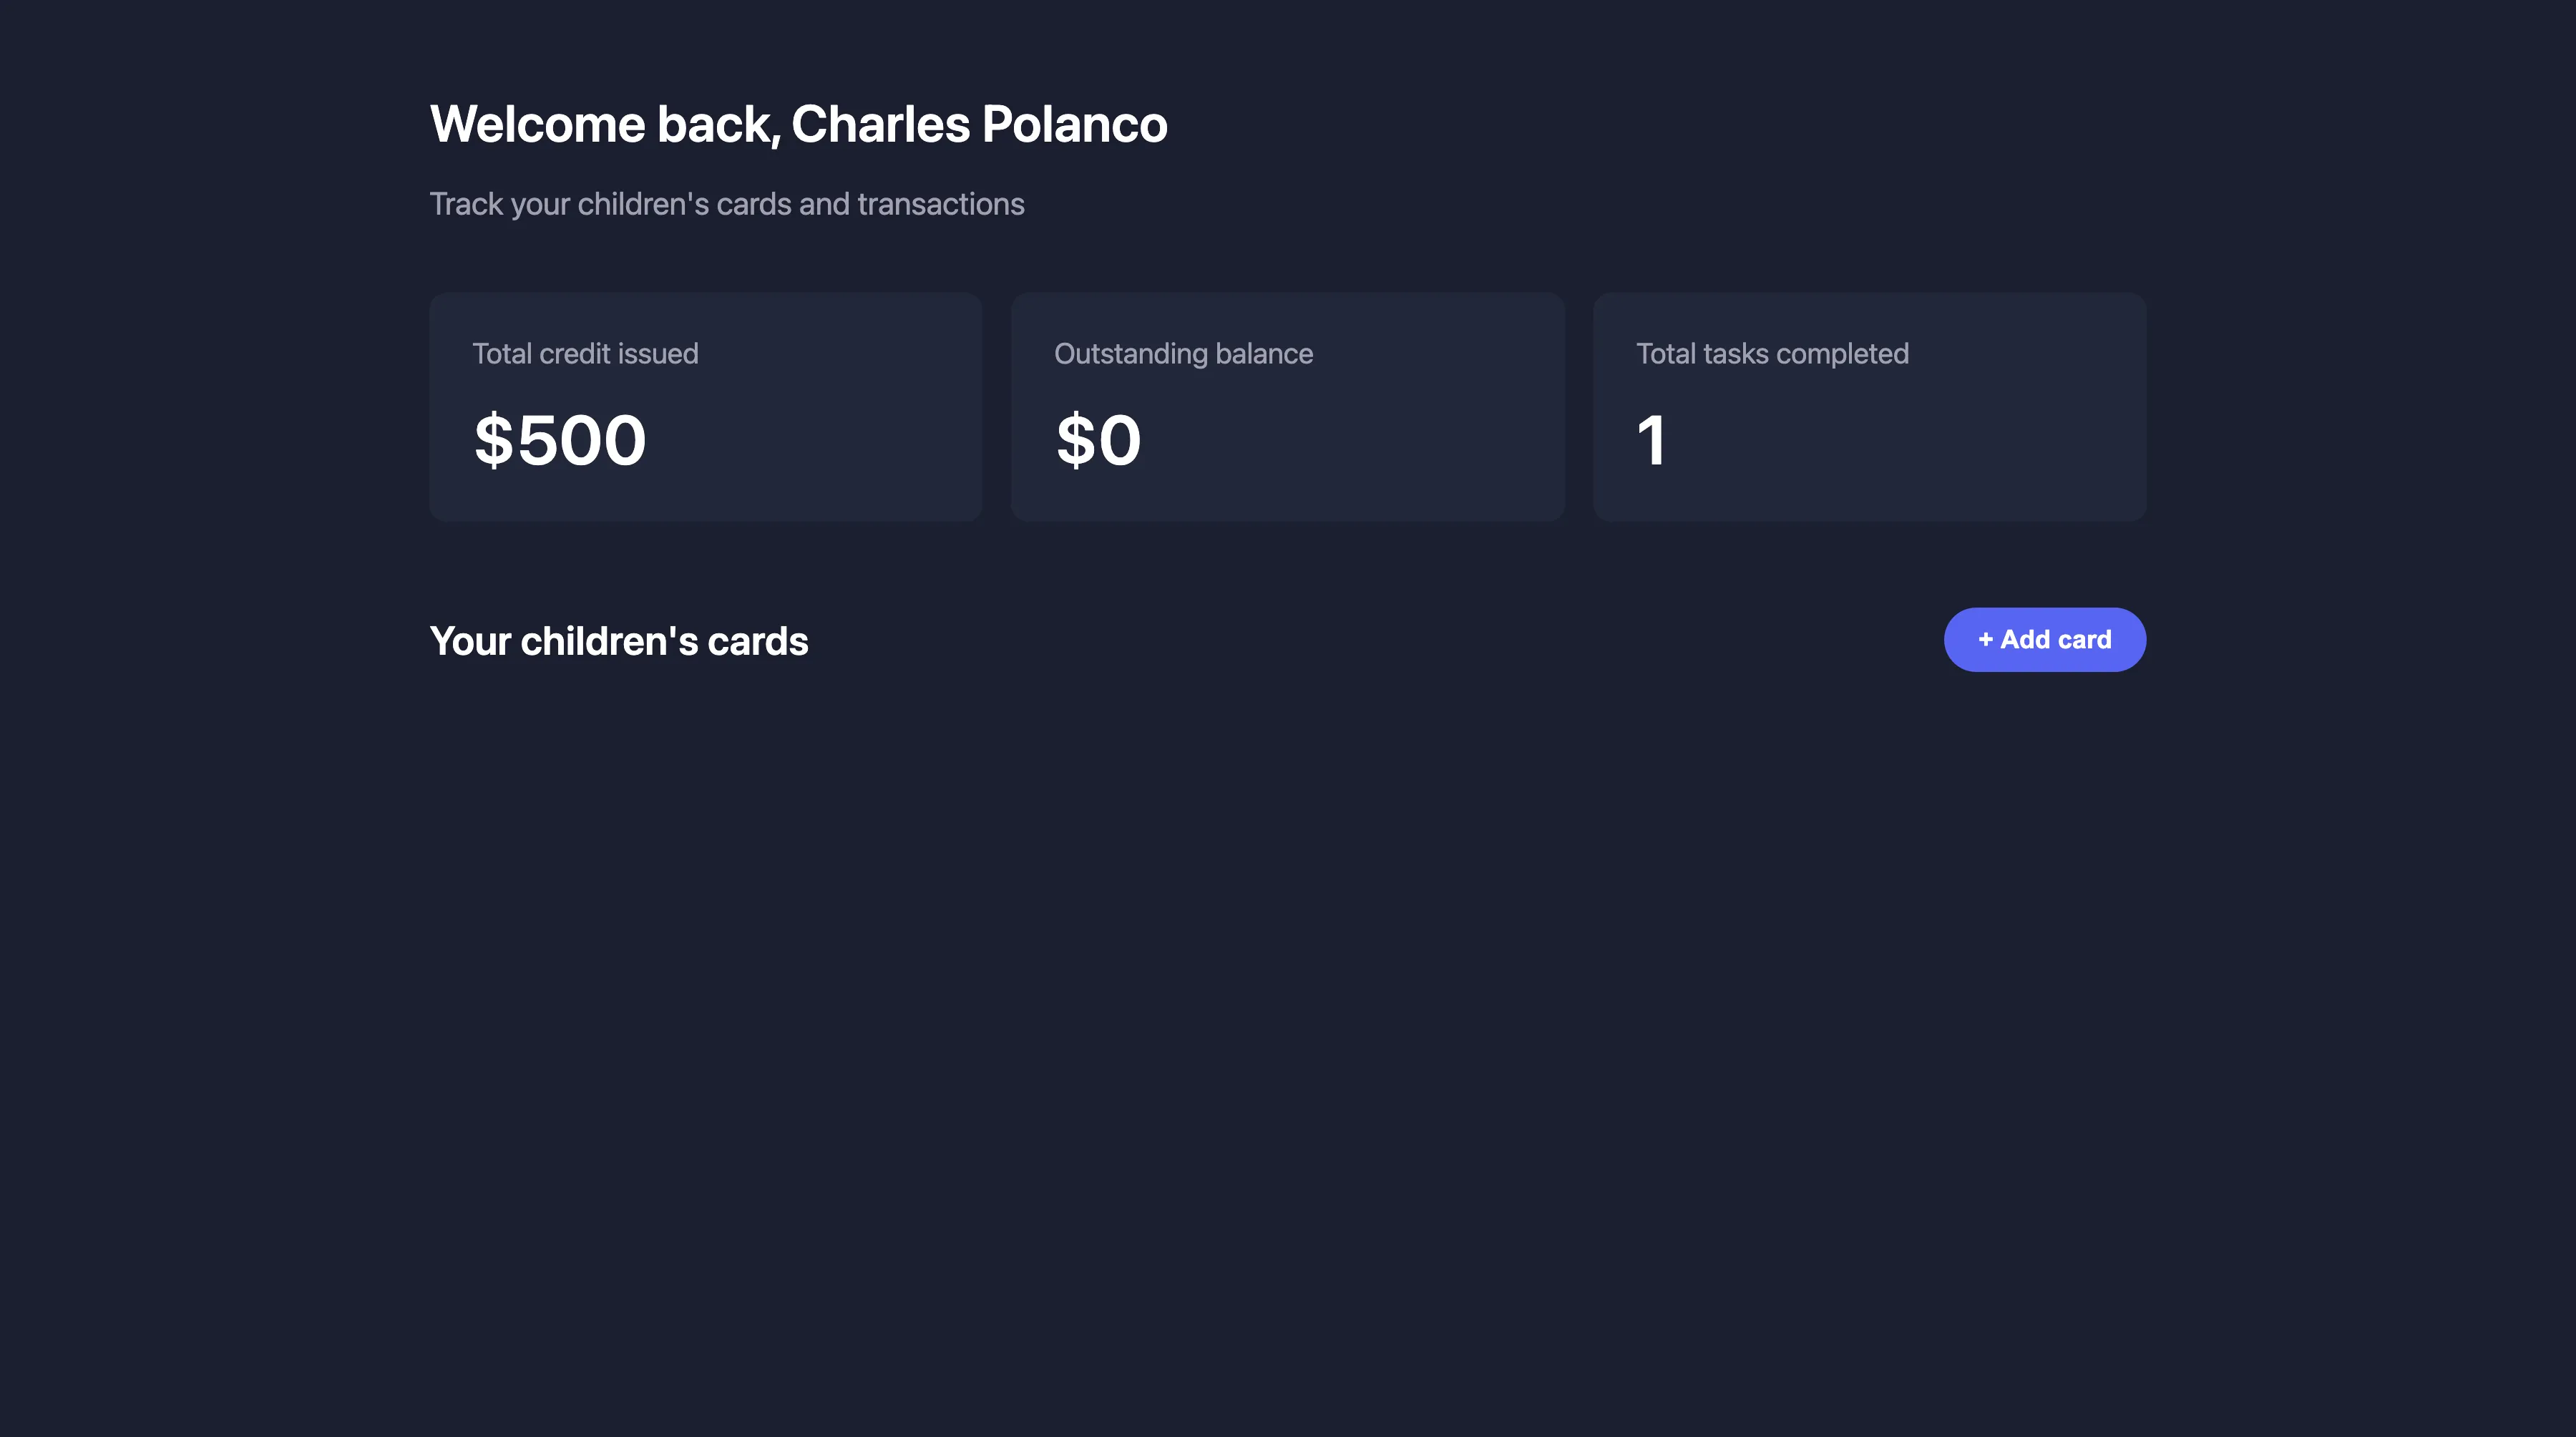
Navigate to your dashboard
Once you're logged in, you'll land on your dashboard where you can see an overview of all your children's cards. To create a new card, click the "+ Add Card" button in the top right corner.
Enter child information
The first step in creating a card is providing your child's information. Enter their full name and email address. We'll send login details and card congratulations to this email once the card is created.

Configure card settings
Next, set up the card's appearance and basic settings. Choose an expiry date and select a card color style from the available options. The card preview will update in real-time as you make your selections.
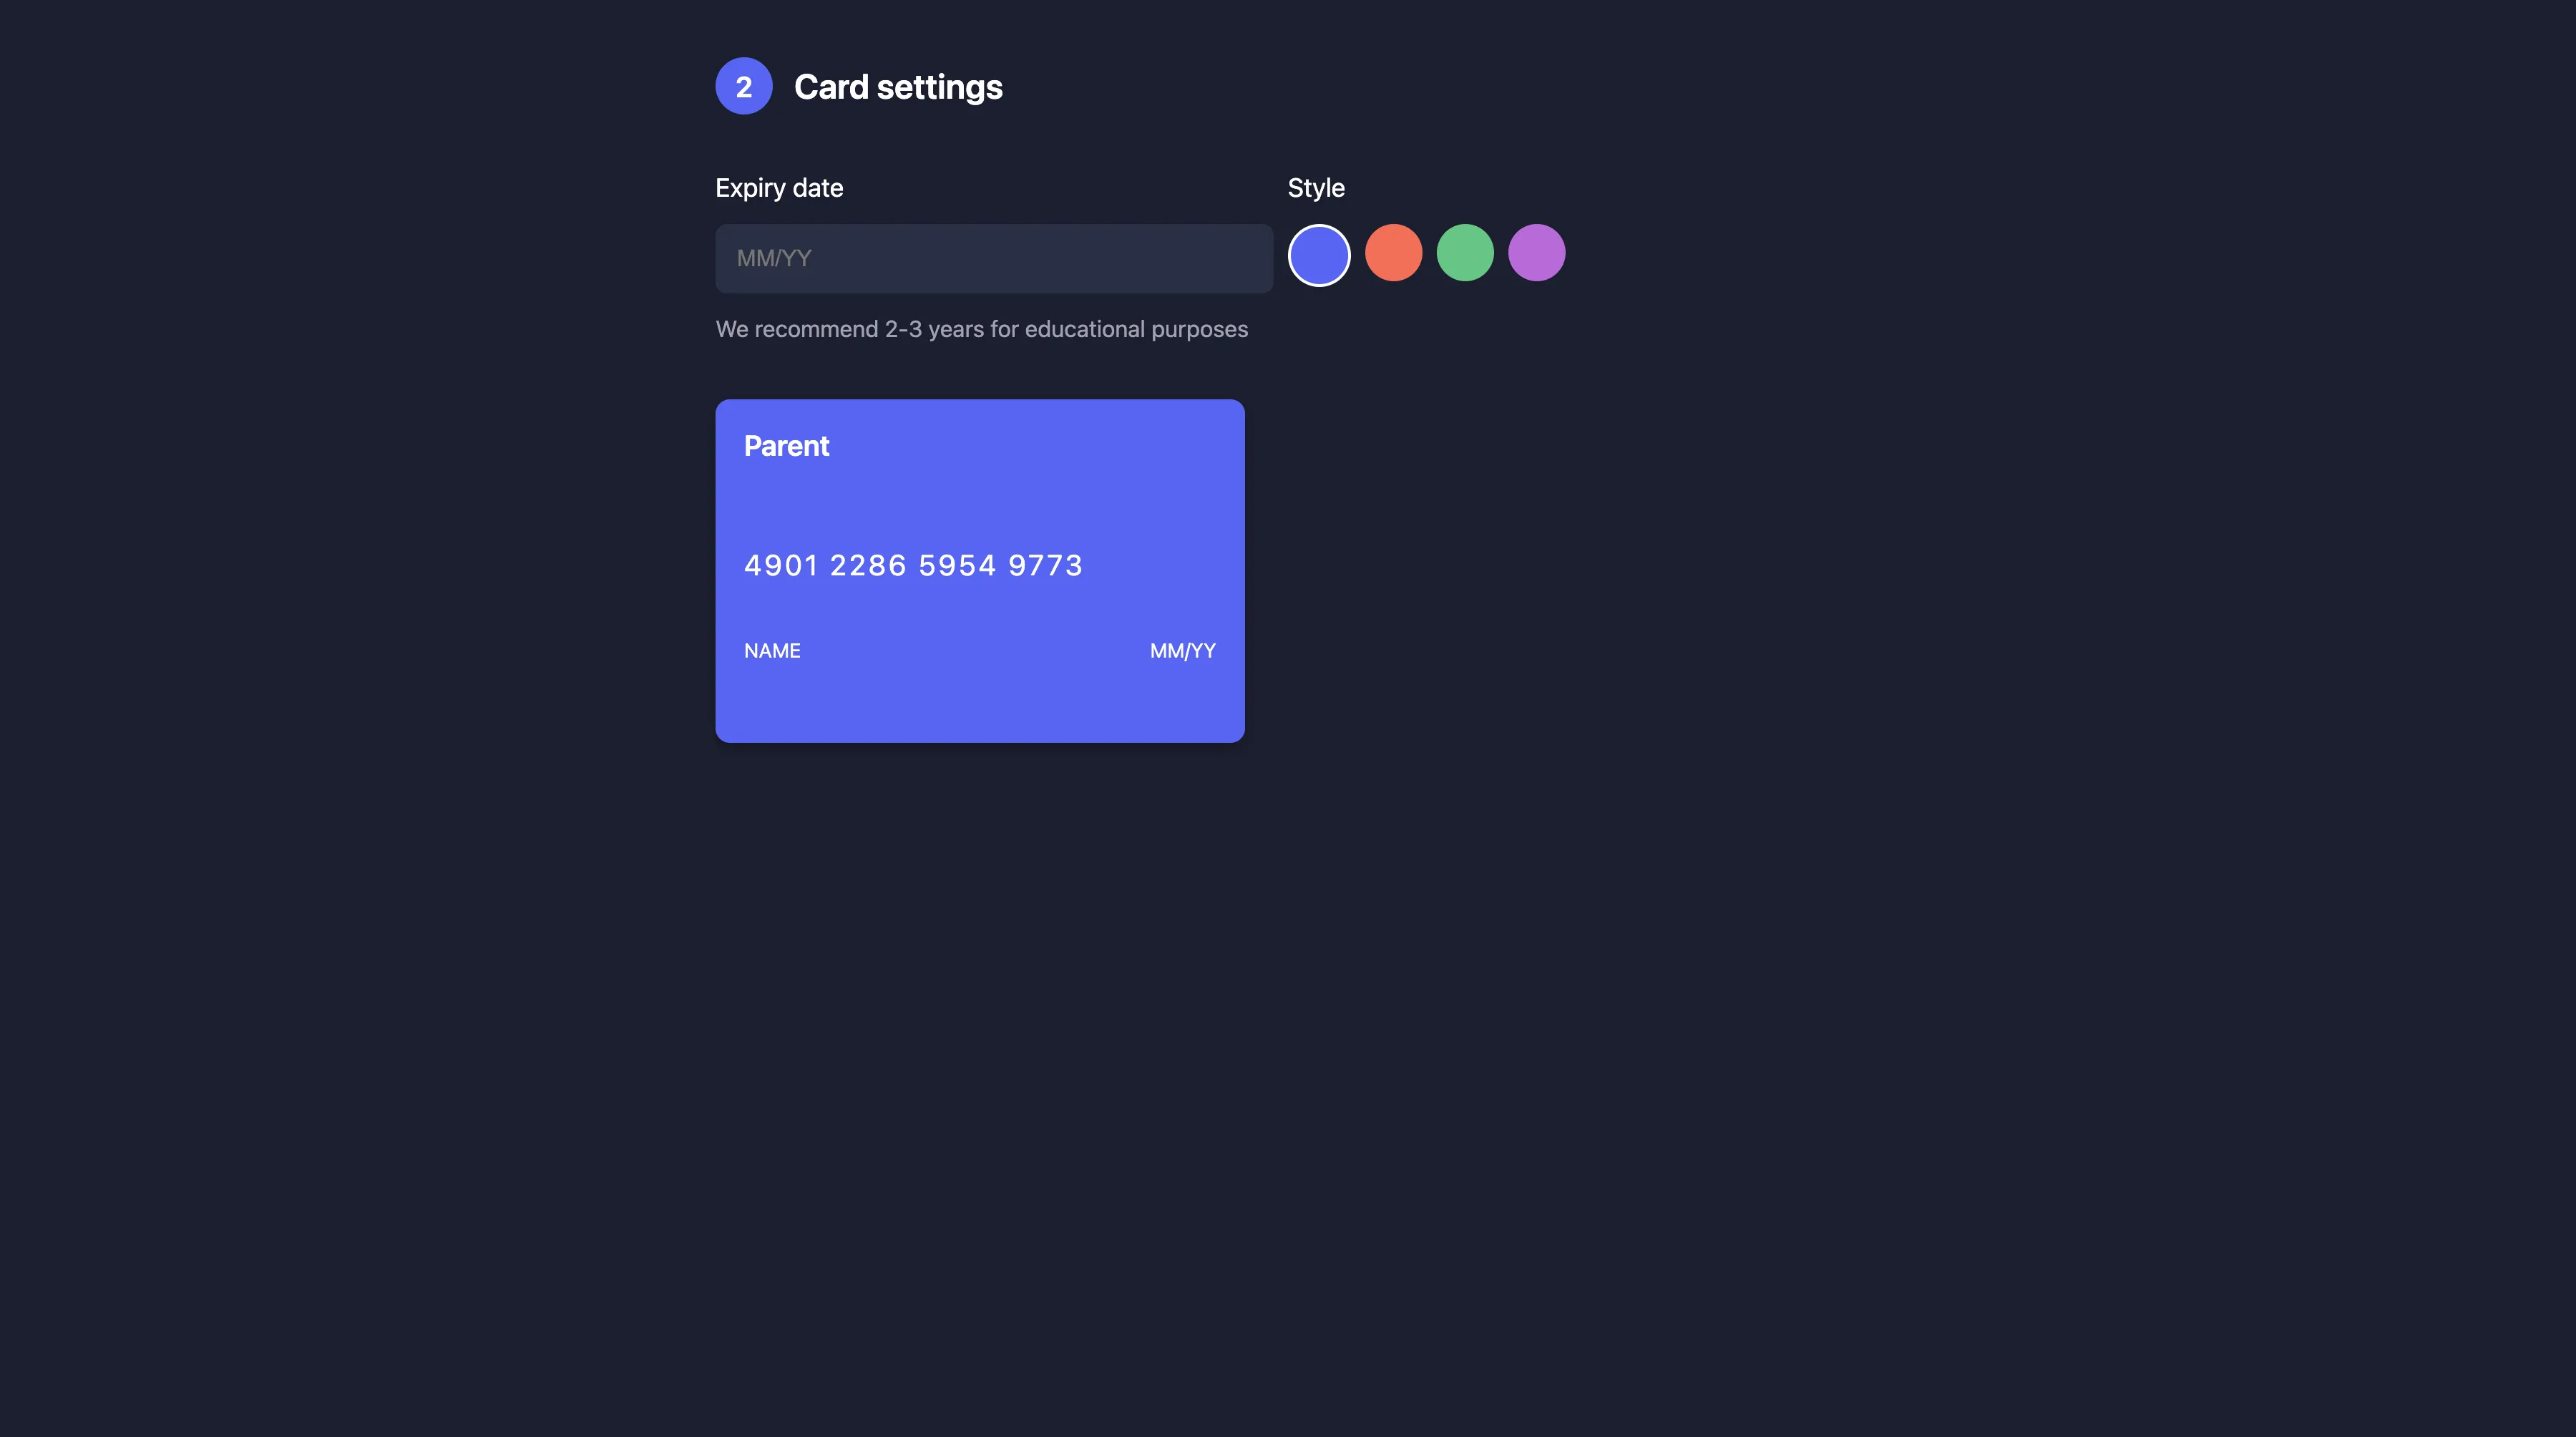
Pro Tip
Let your child pick their own card color! This creates a sense of ownership and makes the experience more engaging for them.
Set credit limit & terms
Establish financial boundaries by setting an appropriate credit limit for your child. You can also configure educational elements like interest rates and payment periods to simulate real-world credit card experiences.
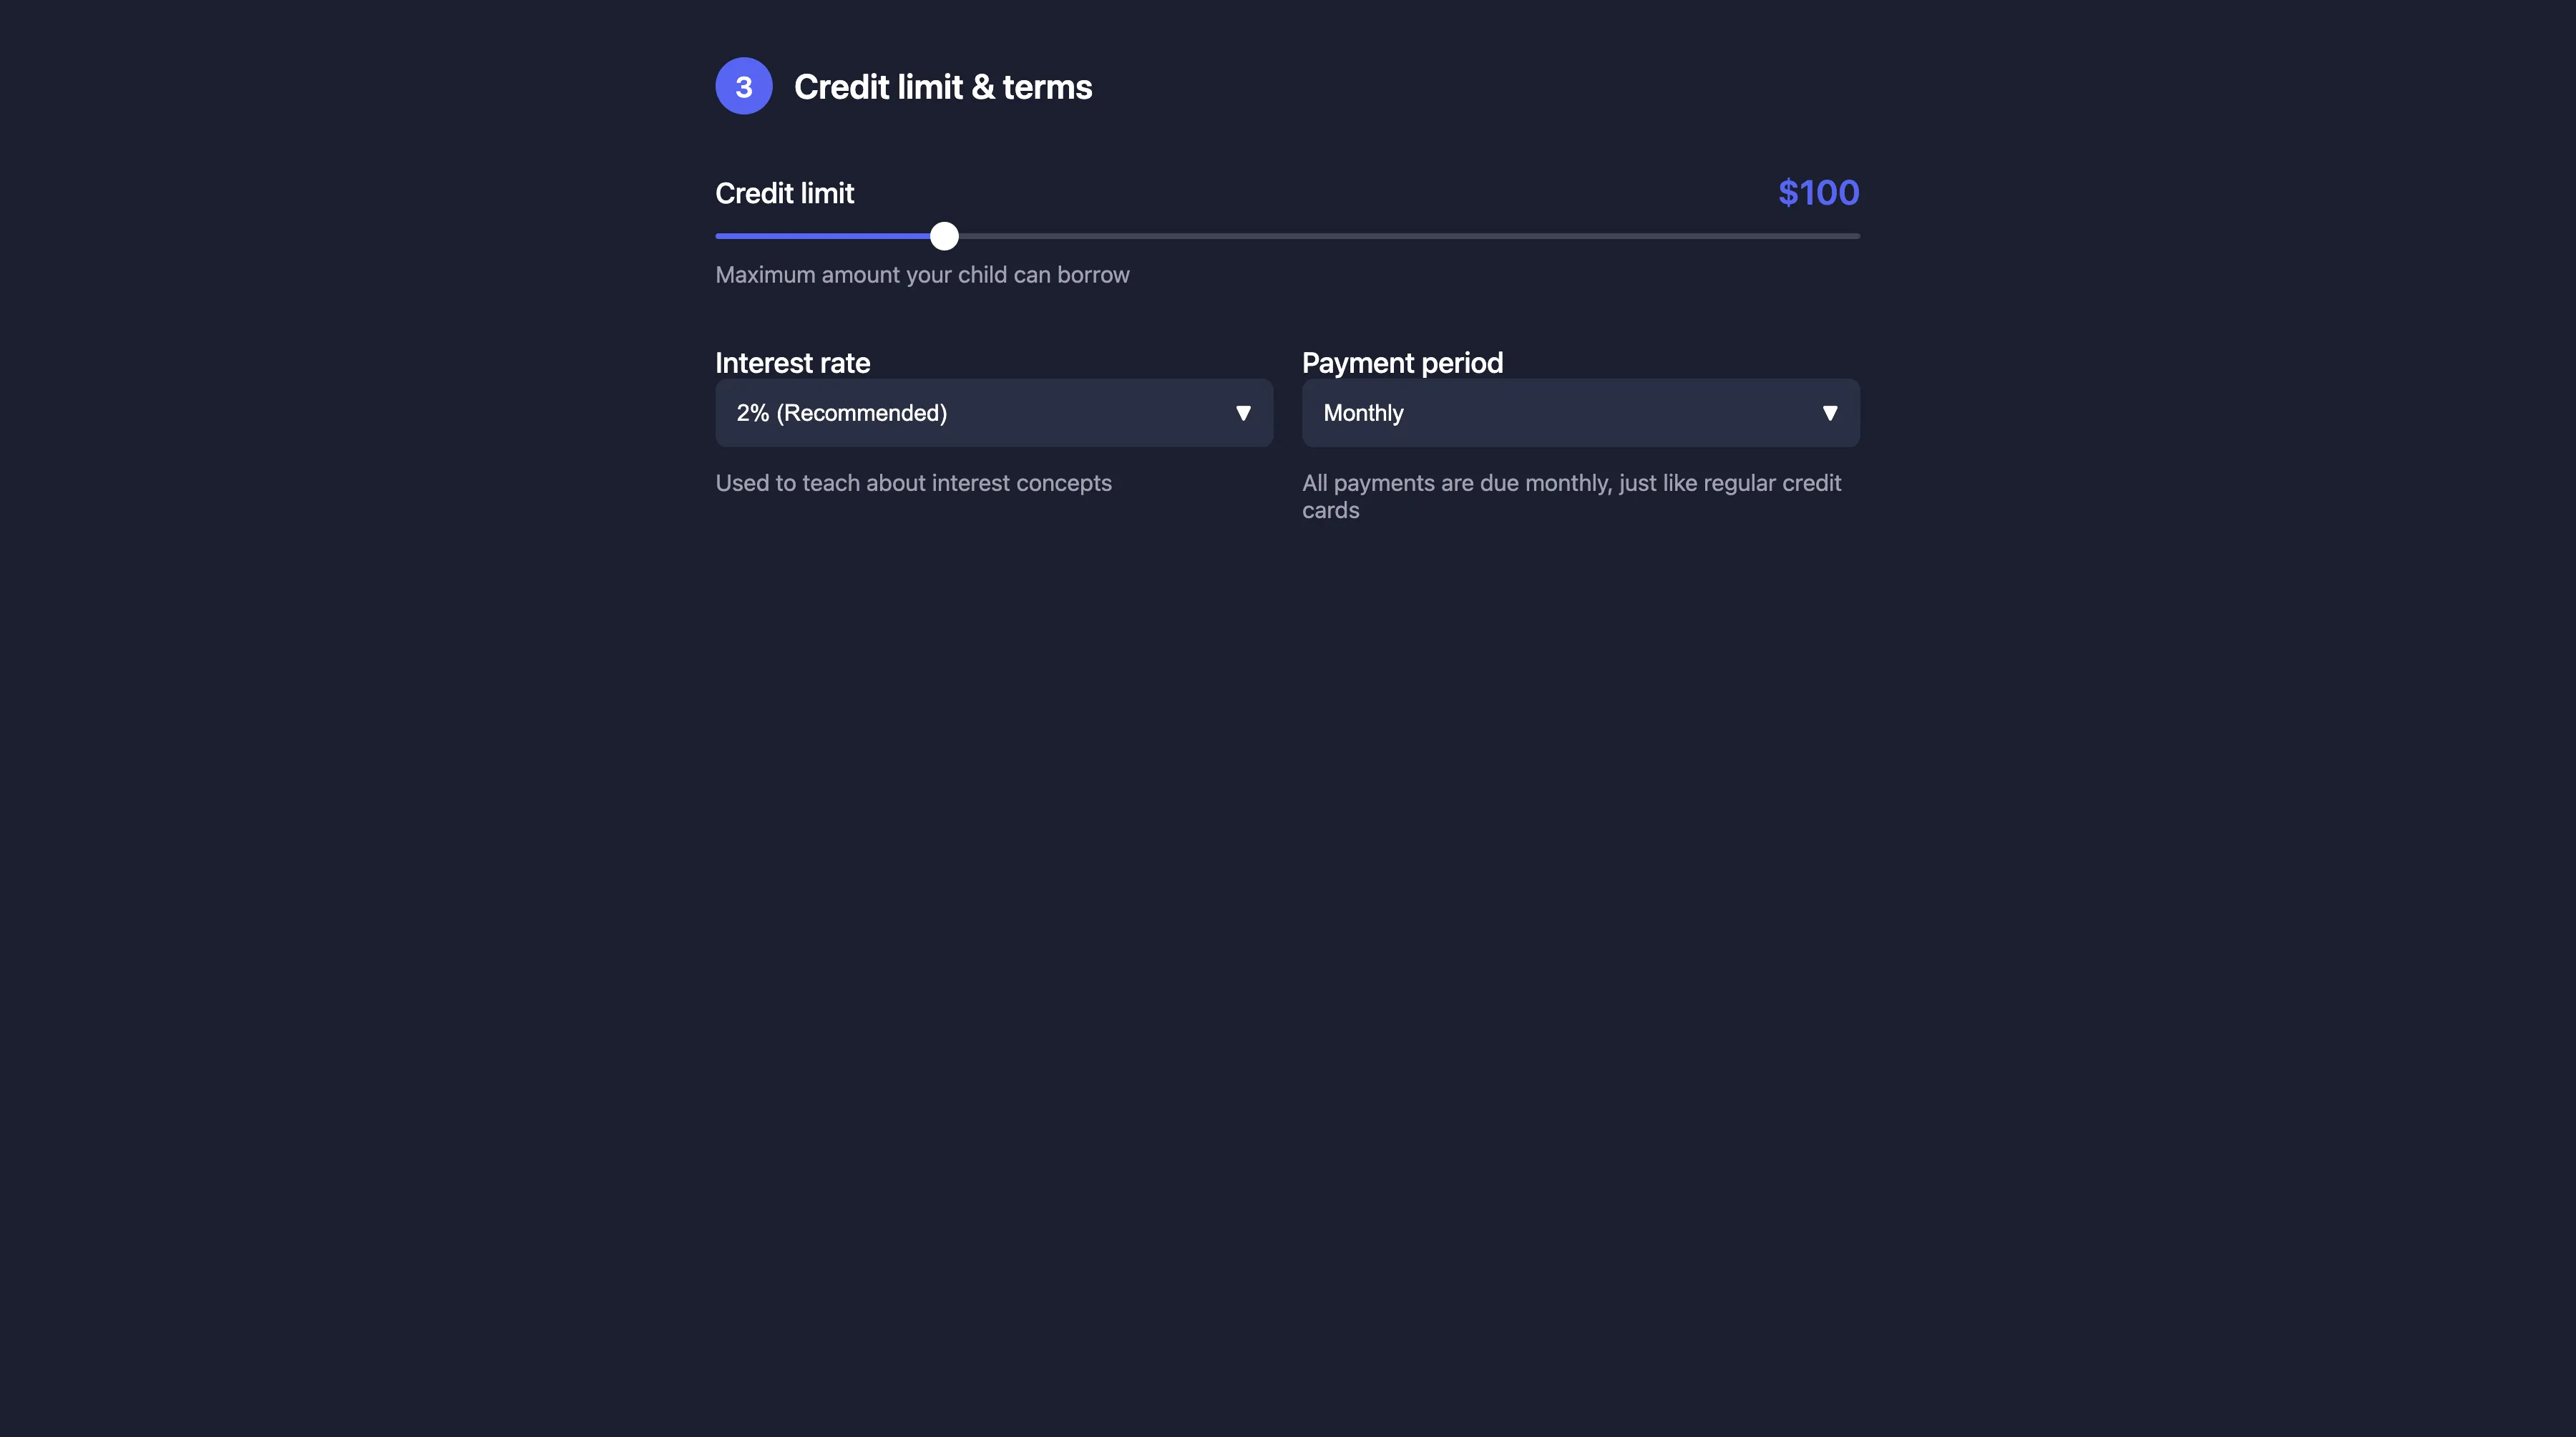
Important
Consider your child's age and financial understanding when setting the credit limit. For younger children, start with a smaller limit (e.g., $50-$100) and increase it as they demonstrate responsible management.
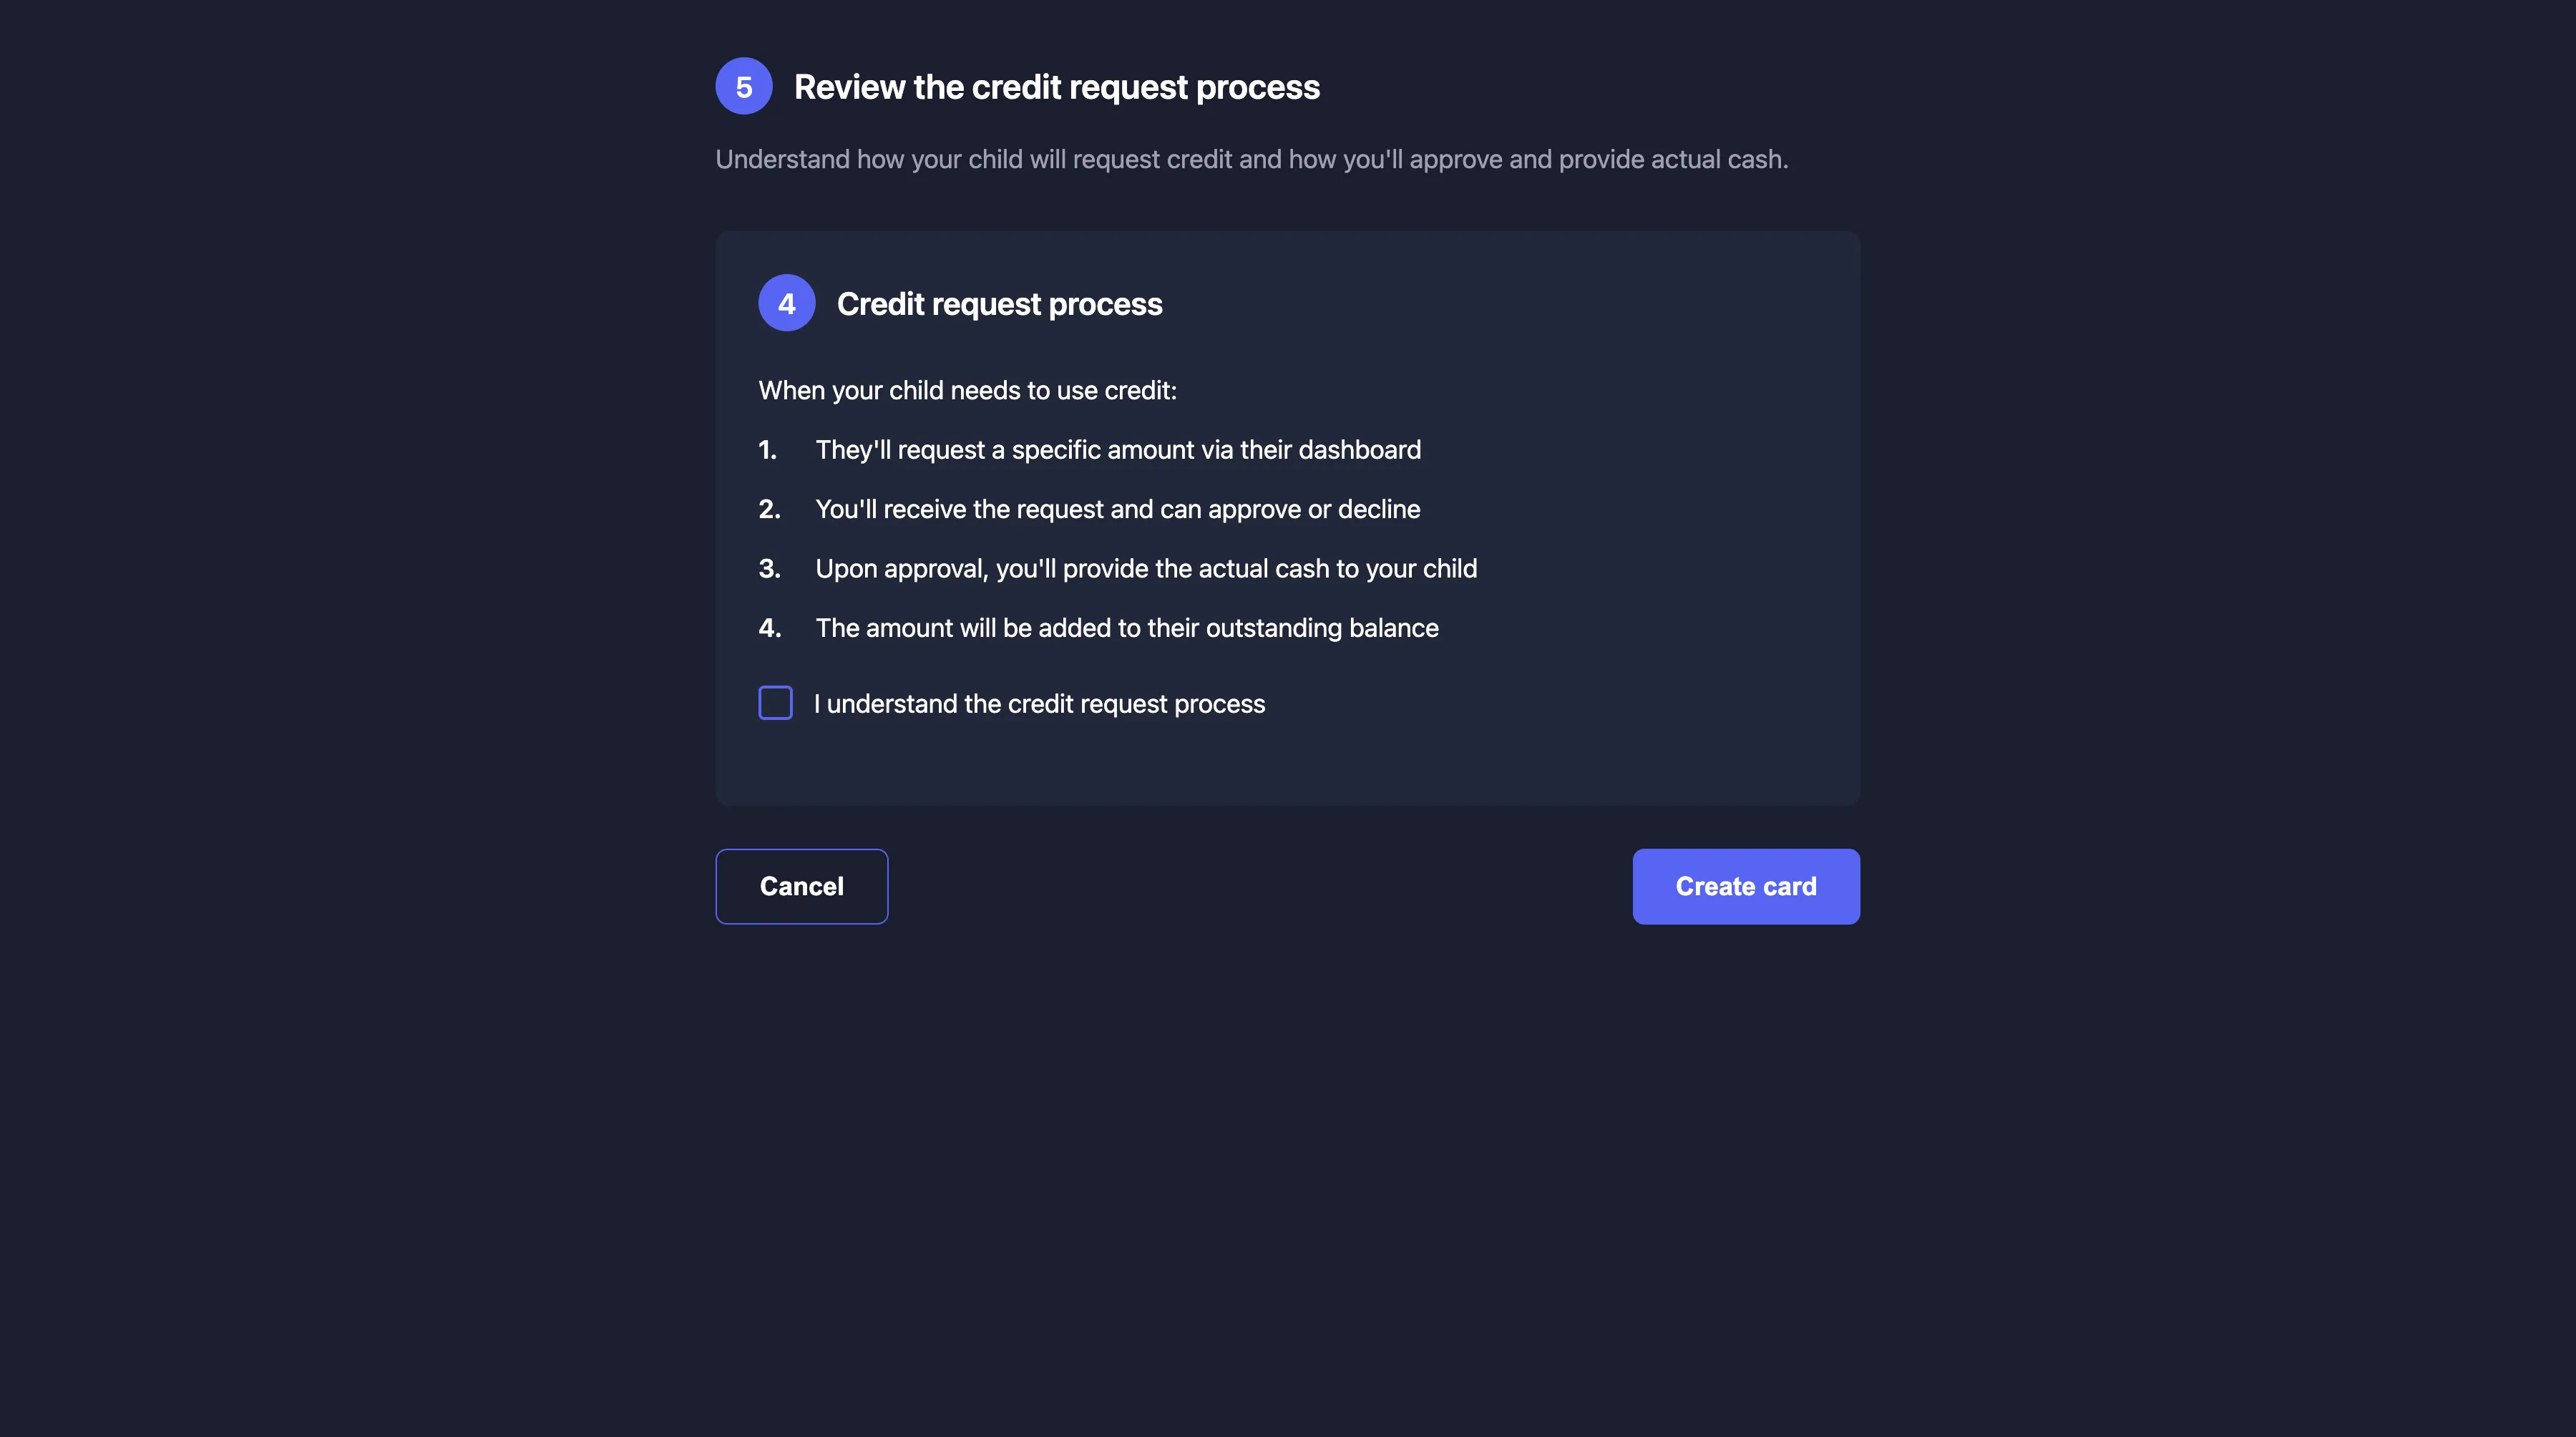
Understand the credit request process
Before finalizing the card creation, review how the credit request process works. This is how your child will request money and how you'll approve and provide actual cash.